Getting to see your home reach its final touches brings mixed feelings. You are just steps away from beginning a new chapter there, but still, there’s a lot left to be done! Yes, that means the post-construction / post-renovation cleaning work.
Since the site is covered with layers of debris, builder’s dust, and whatnot, it’s best to call in the experts for a thorough post construction cleaning.
But what is post construction cleaning? Why is it important? What significant elements does the professional post construction cleaning checklist include?
Let’s find out in our ultimate guide to post construction cleaning checklist, Top 33 post renovation cleaning tips in 2024. (Content refreshed on September 26, 2024)
TABLE OF CONTENTS
Importance of a Post-Construction Cleaning Checklist
Post Construction Cleaning Checklist – Top 30 Tips:
1. Post Construction Cleaning Walk-Through
1.1 Top Three Post Construction Cleaning Phases
- Supplies
- Chemicals
- Equipment
5. Remove Boxes, Cartons, and Plastic
7. Clean the Fans and Light Fixtures
9. Don’t Forget the Baseboards
17. Exterior Areas Cleaning with High-traffic areas (if you live in the house)
18. Clean the Driveway and Porch
24. Marble, Brick, Rocks, etc. Cleaning
- Kitchen
- Bathrooms
- Bedrooms
- Living Room
31. Waste Disposal: Follow Local Guidelines Disposal Of Construction Waste
32. Finishing touches: Final Inspection and Quality Assurance
Bonus Pro Tips for Post-Construction Cleaning
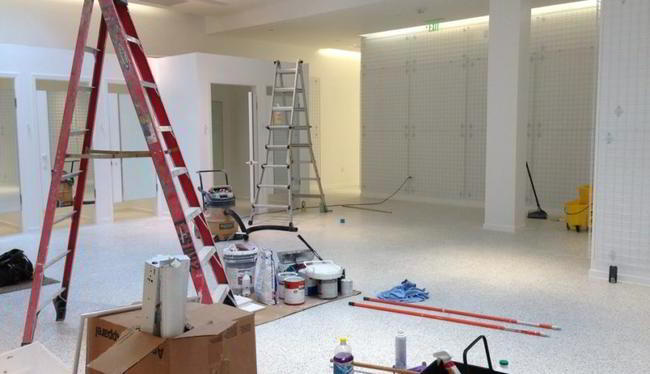
What is a Post Construction Cleaning Checklist?
Usually, upon culminating a construction project, a thorough inspection of the job is conducted to ensure there are no loose ends.
Everything is safely stored in the proper places, and all damages are repaired in line with the standards. Then, the site is cleaned immaculately to make it good as new taking out all the leftover dust and debris.
To do that, we have the post-construction cleaning checklist. It is a comprehensive document that categorizes the site cleaning into tasks and activities.
This way, all the workers know their responsibilities and clean up tasks that must be completed by the end of the project timeline.
An ideal residential or commercial post-construction cleaning checklist should include the following points:
- All the tools and supplies required to clean
- The rooms and places to be cleaned
- Type of cleaning work to be performed

Importance of a Post Construction Cleaning Checklist
Your post construction cleaning checklist is a roadmap or essential guide to cleaning. Everything that needs to be cleaned following the construction or renovation is enlisted in it, so there are no last-minute surprises.
Since you have to cover a large piece of land, dividing it into rooms, including furniture, walls, ceiling, floors, kitchen, appliances, and many other things, having a list makes your life easy.
You must follow the checklist and clean each place and surface one by one, checking them off the list as you proceed. You will get the job done faster and more thoroughly this way than going all in without a plan of action.

Post Construction Cleaning Checklist: Top 30 Tips
Post construction cleaning is an important step that ensures the property is ready to be lived in by tenants or house owners. However, when the space is vast, and so much debris and dust is everywhere, it’s hard to know where to start.
To simplify your job, we’ve put together this ultimate guide and 30 post construction cleaning tips that should be part of every post construction cleaning checklist.
But first, let’s check the walk-through and what we need for a complete post-construction clean-up job.
1. Post Construction Cleaning Walk-Through
The pre-cleaning walk-through is the most important part of post construction cleaning. Whether you are thinking of getting the job done by yourself or hiring experts, this step is mandatory and requires your maximum attention.
Take a walk through your house or apartment and take notes. Check for dust-covered bulbs and other minute tasks easily missed in the checklist. Write about the supplies you’ll need to clean up the areas you pick on during your walk-through.
The walk-through is also vital for the post construction cleaning company as they must outperform the competitors in every way possible. The cleaning service should be optimal, efficient, thorough, and satisfying for the client.
Hence your work begins before you get to the post construction cleaning checklist.
You will first have a site walkthrough with the owner, where you need to start taking points to help you in your cleaning job. Your assessment should essentially be as follows:
- Accurate: You should memorize as much detail as possible during your initial rounds on the property. If there’s anything beyond your provisional checklist, add that in at this stage.
Take notes and snaps for all the supplies and equipment you’ll need. The more detail you capture, the more accurately you can provide solutions.
- Quick: In case of a wide area or large piece of land, you’ll need to be fast. For that, you need to come prepared to the site.
Do a bit of your homework first. Check the market rates, the competitor offerings, and the services you’ll need to provide at the newly constructed home.
However, being quick does not mean you shouldn’t maintain the quality of your work.
Detailed: Finally, if you wish to stand apart from the competitors. Leave no corner or area left without inspection. The best practice is to take along your basic or standard list and add other details and information you need for the cleaning assessment.
1.1 Top Three Post Construction Cleaning Phases
Usually post-construction/post renovation cleaning performed in three most important stages:
1.1.1 – Phase 1– Rough Cleaning
You need to start with a rough cleaning, where the goal is to remove large dust and debris particles. In this stage, we do the following:
- Prepare the area for cleaning
- Remove all construction waste and debris
- Clean large areas with a vacuum cleaner, broom, or mop
1.1.2 – Phase 2 – Preparatory Cleaning
After removing large debris, prepare other surfaces for cleaning. These include the bathrooms, kitchen, and other areas. Please do the following:
- Remove paint splatter and other residues from surfaces.
- Clean tiles, grout, appliances, and fixtures.
- Clean windows, mirrors, and other glass surfaces.
- Wash cabinets, countertops, and sinks.
- Tidy up light fixtures, door frames, mirrors, and baseboards.
- Vacuum the floor.
1.1.3 – Phase 3 – Final Cleaning
Finally, perform a deep cleaning of the entire space.
For instance, Luxury Cleaning NY use vacuum cleaners with special filters that can prevent bacteria and microorganisms from spreading and contaminating the air, threatening your health. The corners needed steam cleaners to kill germs and bacteria.
In this stage, you need to:
- Dust and polish furniture
- Clean carpets, rugs, and upholstery
- Scrub and mop hard surfaces
- Clean windows, mirrors, and other glass surfaces
- Vacuum furniture and carpets.
- Deep Steam Cleaning (if the Steam Cleaner is available).
After this, you need to inspect the area to ensure all surfaces are clean and free from dust and debris.
2. Tools and Supplies needed for Post construction cleaning checklist
We need some basic supplies and materials for cleaning the site. But some areas require special tools and expertise for efficient cleaning.
When hiring professional post-construction cleaning services, ensure the team uses industrial vacuums, pressure washers, and specialized cleaning agents for the best results.
Here’s a list of the supplies and tools you’ll need for a post construction cleaning job.
Supplies
- Scrub brushes
- Scrub pad
- Broom
- Mop
- Dustpan
- Rags
- Squeegee
- Dust cloth
- Garbage bags
- Microfibre cloth
- Bucket of water
- Spray bottle
- Mask
- Gloves and goggles
Chemicals
- Multi-purpose or all-purpose cleaner
- Detergent
- Bathroom and floor cleaner
- Disinfectant
- Glass cleaner
- Vinegar
- Dishwash Liquid
Use eco-friendly cleaning chemicals for a safer environment.
Equipment
- Commercial wet and dry Vacuum cleaner
3. Empty Trash Cans
One of the most commonly missed tasks following a construction project is emptying the recycling bins. Check them first; you’ll need them empty to throw away all the garbage materials you gather while cleaning.
Empty all the recycle bins and throw away the garbage appropriately.
4. Declutter
The best way to start the post construction clean up is to declutter. Look for the big or visible items that need to be discarded, such as tea cups, empty paint buckets, and other unwanted leftover construction parts. Ensure you dispose of them properly.
5. Remove Boxes, Cartons, and Plastic
Plenty of packing materials will be available at the site. The workers will have thrown most of it while unpacking new appliances and furniture.
Like broken boxes, tapes, covers, plastic material, etc., look for them and throw them away. If you are making recyclable piles, throw them there to sort towards the end.
6. Remove the Paint Droplets
It’s common for paint to get to the items and places where it shouldn’t. At times the painters forget to clean those areas. While you are ticking things off your post construction cleaning checklist, make sure to check and wash them off where needed.
Pay special attention to the hinges. Usually, we overlook these, and the painters often hit their brushes here. So it looks unpleasant to the eye.
7. Clean the Fans and Light Fixtures
It’s best to clean the dust following the top-down approach. Clean the ceiling fans first. Use a rag, all-purpose cleaner, and water to wipe the blades and the fan body.
Next, clean the light fixtures using the same rag and all-purpose cleaner. If you can remove the shades, wash them to bring out the shine. Place them back after properly drying them.
8. Clean Walls
Wipe clean the walls. When there’s construction dust on the property, it settles everywhere, yes, walls included.
So, scrub the walls, going from the top to the bottom, and clean off the dust that has settled there.
Follow the practice for all the walls.
9. Don’t Forget the Baseboards
Of course, remember the baseboards! Due to their design, the baseboards will have much dirt and debris settled on them. Move the furniture and other items aside from the wall and clean all the walls first, and as your reach, the bottom, clean the baseboards thoroughly.
You can use an all-purpose solution or dishwashing liquid to clean and wipe them with warm water.
10. Vacuum the Carpets
If you have carpets, ideally, it’s best to cover them up before the construction begins. But despite that, dust and debris could settle on them. Vacuuming the carpet will remove all the dry dust and debris, giving it a clean look.
However, you will need commercial dry-wet vacuum cleaning if you didn’t cover the carpet before the construction work.
11. Mop the Floors
Next, you must mop the hard wooden or concrete floors not once but twice to remove the dry debris.
12. Counters Spaces
Much of the dust settles onto the counters and other surfaces. Use a wet sponge or cloth to wipe them clean. If you want to add a bit of shine, use the microfiber cloth to scrub and clean the surfaces.
13. Mirrors Cleaning
Use the glass cleaner spray and microfiber cloth to wipe clean the mirror. Never use ordinary rags for cleaning the mirror. They will leave a thin film or streaks on it.
14. Window Cleaning
Using the same glass cleaner and a microfiber cloth, clean all the windows. Clean them on the inside first, then the outside. Make sure there are no leftover streaks or spots.
If there are any marks of paint on the window, clean them. Finally, squeegee cleans the window till it looks completely transparent.
15. Window Pane Cleaning
Per their default design, window sills can quickly gather all the dust and debris in them. While you can remove the dust in clear view with a rag or duster, the corners need specific attention. Use the vacuum cleaner and unique heads to clean the corners and draw out all the dust particles
16. Handrails
If you have a stairway installed, clean the handrails carefully. Wipe down the fence and supporting poles individually. There will be a bit of dust, so you need a wet cloth with some all-purpose cleaner to clean the handrail.
17. Exterior Areas Cleaning with High-traffic areas (if you live in the house)
Clean the porch, garden, and walkway of the house. You will find more essential items like paint cans, boxes, and other materials; throw them out first, then get a rake and broom to clean the garden.
Remove construction and demolition materials, clear vents and ducts, and clean glass and reflective surfaces.
Sweep decks, porches, and patios, clean garage doors or parking barriers, and return landscaping design elements and décor to their original positions
Clean the doors, knobs, and frames from top to bottom.
18. Clean the Driveway and Porch
Use the power washer to wash away all the dirt and grime from the driveway. Check for garbage around the house and dispose of it properly. Pick up trash and debris.
Remember to clean the external light fixtures like the garden lights and lamps.
19. Clean the Doors
Clean all the doors thoroughly. The simple job requires a wipe cleaning action using the dusting cloth and all-purpose cleaner.
But make sure you pay attention to the material of the door. For say, if it’s made of glass, use water and an all-purpose cleaner and wipe it using a microfiber cloth.
If it’s wooden, you may use the furniture polish to add a bit of shine to it.
If the door’s just been painted, use the minimal chemical as they may scrape off the paint.
20. Cabinets and Wardrobes
Next, we have to wipe all the cabinets and wardrobes inside out. That includes the cabinets in the kitchen, the bedroom wardrobes, and those in the bathroom.
An additional step you can add here is to use the wax cleaner for the cabinets and wipe them with a cloth. This will bring out the shine.
As for the kitchen cabinets, make sure you clean them thoroughly inside. Since these would house food items and other eatables, it’s essential to have them cleaned. Sanitize and fumigate towards the end.
21. Vents Cleaning
Vents and grates are often the most neglected parts of a newly constructed place. But these quickly get a lot of dirt and dust trapped inside, so it’s essential to include these in your post construction cleaning list.
22. Furniture Cleaning
Next, get to cleaning the tables and chairs. Clean everything top down using the duster and wipe with the all-purpose cleaner.
Clean the chairs, desks, tables, sofas, mantelpieces, etc.
23. Appliance Cleaning
You may have installed appliances at the new place. There are appliances like the
- Refrigerator
- Oven
- Stove
- Washing machine
- Dishwasher
- Dryer, etc.
Make sure to clean them using a mixture of vinegar and water properly.
24. Marble, Brick, Rocks, etc. Cleaning
Masonry cleaning is and should also be an essential part of the post renovation cleaning checklist. This includes cleaning the bricks, rocks, marble, etc. Clean them all thoroughly using the cloth, wiping away all the dust.
25. Tip #25 in Post construction cleaning checklist – Ventilate the Whole House
All house rooms should also be adequately ventilated following the construction work. There’s a lot of dust still suspended in the air and other contaminants. Plus, paint fumes can make the place uncomfortable to breathe in.
Open the doors and windows to allow unrestricted airflow through the property. Let the house stay ventilated from half an hour to 45 minutes.
Youtube video by wikiHow.
26. Post Construction cleaning checklist Tip #26 – Use Air Purifiers
Try the air purifier if ventilation fails to remove the odors and paint smell. You can infuse it with your favorite scents making the home inviting and warm.
Youtube video by HomeAirGuides.
27. Wipe Switchboards
Clean and wipe all the switchboards. Be careful not to use a wet cloth; clean the dust and debris sticking to the board.
28. Go Room By Room
The best practice is cutting tasks into smaller individual-level jobs, like rooms. Start from the outside, and then work through each room cleaning top down to achieve perfection.
Here’s a little room-by-room guide for you.
Kitchen cleaning TIPS:
The new tenants or house owners will be cooking food in this room, so it needs to be clean and safe for their health. Make sure not to leave off any chemicals or harmful substances in the kitchen that could get into the storage cabinets and other food items.
Here’s how you’ll go about cleaning the kitchen:
- Ceiling
- Walls
- Doors, door knobs, and baseboards
- Light switches
- Cabinet front doors
- Cabinet knobs
- Inside cabinets
- Countertops and shelves
- Sink and backsplash
- Windows including windowsills
- Large appliances (Refrigerator, hood, oven, microwave oven, dishwasher)
- Small appliances (toaster, coffee maker, etc.)
- Empty the garbage
- Vacuum and mop the floor
- Clean inside the oven and refrigerator
Bathroom Cleaning:
Whether we like to say it or not, the construction workers often use the site’s toilets during construction. So cleaning the toilet post construction cleaning is mandatory for hygiene and safety.
Here’s how you’ll clean the bathroom, step-wise.
- Clean the sink, tub, shower, toilet, and other fixtures
- Remove the trash
- Shower door
- Cabinets, drawers, vanity, and mirror
- Clean the windows, lights, and door
- Wipe clean the grab bars, door knobs, and door handles
- Sanitize the sink and toilet
- Mop and clean the floor
Bedrooms Cleaning:
A clean and cozy bedroom can make the clients smile and lift the pressures and stress. Here’s how you’ll go about cleaning all the bedrooms one by one.
- Ceiling and ceiling fan
- Walls and light fixtures
- Clean the baseboards
- Dust all surfaces and desks
- Vacuum the rugs and carpets
- Vacuum all hard surface floors
- Clean the cabinets and wardrobes inside out
- Wipe clean mirrors
- Windows and windowsills
- Doors and door knobs
- Light switches
- Mop the floors
- Vacuum inside the fireplace and wipe clean
Living Room Cleaning Tips:
The living room needs to look clean and appealing. Since it is usually centrally located, it collects dust during construction. Here’s how to clean the living room:
- Ceiling and fan
- Walls and baseboards
- Windows
- Dust all tables, chairs, sofas, etc.
- Clean closets inside and out
- Vacuum rugs and carpets
- Clean mirrors
- Clean door knobs and doors
- Wipe light switches
- Vacuum and mop the floors
- Empty the garbage cans
- Sweep clean balconies
29. Disinfect Everything
As you move from room to room, start disinfecting the rooms too.
Clean first, then spray the disinfectant to kill off contaminants and germs that may cause allergies and health issues.
The new place will become sterile and hence safe for settling in.
30. Welcome Mat
Now that the entire house is clean and ready to live in, how about some final touches? Place a welcome mat at the entrance. It’s a simple tip to make the place more personalized.
Of course, it will also serve its primary purpose as the doormat.
People can wipe their feet on it, and the house will stay clean of the dirt and grime that comes along the shoes.
31. Waste Disposal: Follow Local Guidelines Disposal Of Construction Waste
Complying with the various local regulations regarding waste management is essential. Due to the fact that no federal law directly controls waste management practices, construction firms must address a number of divergent local rules pertaining to waste and recycling. The changing nature of such regulations and their complexity in monitoring makes them very challenging for most enterprises to abide by. Examples of such local regulations include required recycling, prohibition of certain items from landfills, and proper disposal of electronics and hazardous waste. The fines for non-compliance are sometimes very high and can even result in one’s business being shut down. Along with this, it will also give a bad reputation to the brand and fame with consumers, suppliers, and society as a whole.
32. Finishing touches: Final Inspection and Quality Assurance
Inspect your home or commercial area for any particular spots or areas that may have been missed, and apply further cleaning if necessary. Address remaining stains, marks, or smudges to complete an immaculate finish.
Final checking after cleaning, which provides quality in a task performed. Make a round in every area, seeing that any anomalies are dealt with on time.

Bonus – Extra Pro Tips for Post Construction Cleaning
Here are some additional post construction cleaning tips for a smooth cleaning job.
- Keep all the tools and supplies ready before starting the cleaning.
- Keep the tools and supplies clean. Keep washing the dusters, microfiber cloth, etc. Else it will only make a bigger mess and spread the dust further around the house.
- Mark and label the clutter as you go about cleaning. Also, label the recyclable garbage and other salvageable items on the property.
- Use a trolley to keep your supplies. It will prevent solutions from spilling and make cleaning more convenient and quick.
- Use digital clipboards to keep tabs on your post construction cleaning checklist.
Digitalize your Post Construction Checklist for Free – Download it from our website – Post Construction Checklist PDF.
This checklist mainly focuses on residential builds, but with our Post Construction Cleaning Checklist PDF that you can download, you can use it for commercial or industrial construction projects too!
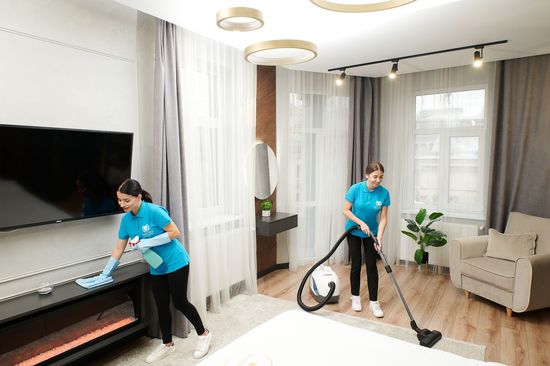
Why Hire Professional Post-Construction Cleaners
An amateur cannot complete post construction cleaning within a few hours. You need the proper planning, supplies, tools, equipment, experience, and the post construction cleaning checklist to remove all the dust and debris from all over the place.
Moreover, it will take a lot of effort and time to clean the place and have it ready on time. The professionals can take the burden off your shoulders and give you a clean ready-to-be-lived-in home in a much shorter time.
Here are further reasons why you should consider hiring professional services for the job.
- Professionals leave a healthy and safe place for everyone.
- Having professionals at the job saves you the time you can spend on numerous other projects instead of cleaning.
- Get your house clean per your schedule.
- You get high-quality standardized cleaning.
- No hassle of looking for or renting expensive supplies and equipment
- Nothing gets by the professional eye!
Conclusion of Post Construction Cleaning:
There you have it—your complete guide and post construction cleaning checklist. Remember, your list needs to be thorough; there’s no margin for error or missing out on any part of the cleaning process.
The best way to achieve this in the minimal possible time is to hire a renowned professional company for the cleaning.
Also if you need to know the price of construction site cleaning you can check our post construction cleaning calculator here.
At Luxury Cleaning NYC, our experts come equipped with the knowledge, skills, and tools to clean up the place optimally and at its best. Call us today or get in touch through our website to order post-construction/post-renovation cleaning services online.
Related Blog Posts from Luxury Cleaning NY Blog
Final Cleaning Construction: The Phases, Dos, and Don’ts
The dream house you've built for the past year is finally done. First of all, congratulations. Secondly, get your cleaning gloves on for final cleaning construction. Yes, we know you were expecting trips to Home Depot and picking out items like color schemes, lighting...
How to Steam Clean a Couch 101
Steam cleaners have been around for some time, but they've only gained popularity now that people are becoming more aware of harsh cleaning chemicals and environmental allergens. Spring cleaning time is coming up, and you want to give your couch a good rinse. But how...
How to Clean Prefinished Hardwood Floors: A Quick Guide
Prefinished hardwood floors come factory-finished and ready to install. But while installation may be a breeze, keeping these floors spick and span isn't always child's play. Speaking of child's play, has your little one left food stains on the floor? Do you see...
How to make the process of post construction residential cleaning less stressful?
Regardless of how careful you or the repair workers were during construction work, you will still need post construction residential cleaning. Even if you cover the floors and furniture with protective materials, tiny drops of paint, a layer of construction dust, and...
How does steam cleaning work? Luxury Cleaning NY Lifehacks & Tips
What is a steam cleaner? How does it work? How does steam cleaning work? This question arises because few people clean the apartment for their pleasure. You often have to clean on weekends, this process takes a lot of time, and you get tired of cleaning. That's why...
Housekeeper vs Maid: Are They the Same?
Housekeeper vs Maid: Are They the Same? The profession of a maid and housekeeper enjoys a reasonably high demand in the labor market for domestic staff. Often, such workers are sought not only by wealthy people but also by people of average means. Are you looking for...


